Computer Running Hot
Computer Running Hot
Issue [Computer Running Hot]
Devices [Windows, MacOS, Chrome OS]
Suggested Resolutions [See Steps Below]
Windows:
Step 1: Check That the Fans Are Working
But if your computer fan is loud consistently, here are several easy ways to check if your fan is working properly:
When turning on your PC you should hear the fans whirring into motion
Place your hand near the computer’s fan grille and feel for vibration
Confirm the fans are running by using a flashlight to look for movement through the fan grille
If your fans won’t stop buzzing, it may be time to replace or upgrade your hardware with heat sinks to soak up excess heat, or even use an external PC cooler to help regulate temperatures.
Step 2: Improve Airflow For Desktop PCs
Even if the fans are working perfectly, your computer can still overheat without a steady supply of cool, fresh air circulating. To help ensure the vents stay unobstructed, place your PC on a flat, hard surface, and make sure it’s free from obstacles on all sides.
Don’t try to improve ventilation by removing side panels or other parts of your computer’s casing, as this will alter the internal pressure, making it even harder for the fans to maintain sufficient airflow. It will also allow dust, fluff, and other junk to build up inside your machine, which will only make things worse.
Step 3: Avoid Using Programs That Use A lot of CPU Power
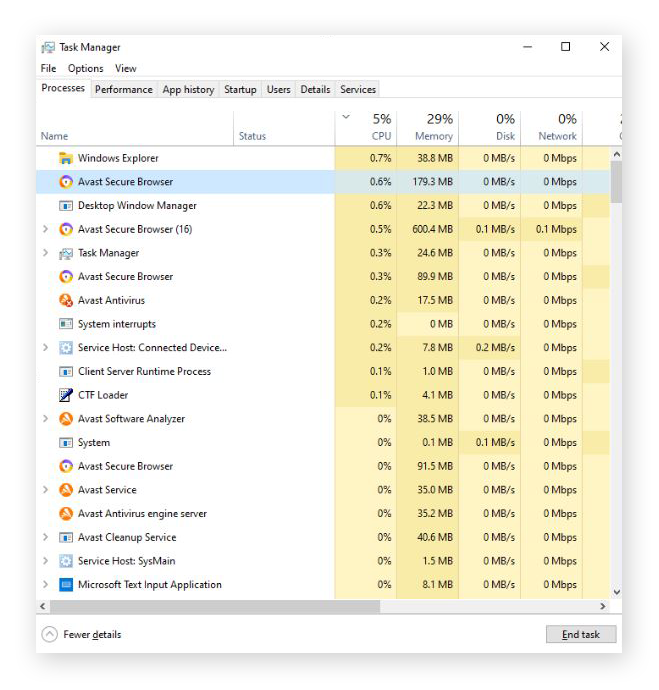
Step 4: Close Unnecessary Browser Tabs and Programs
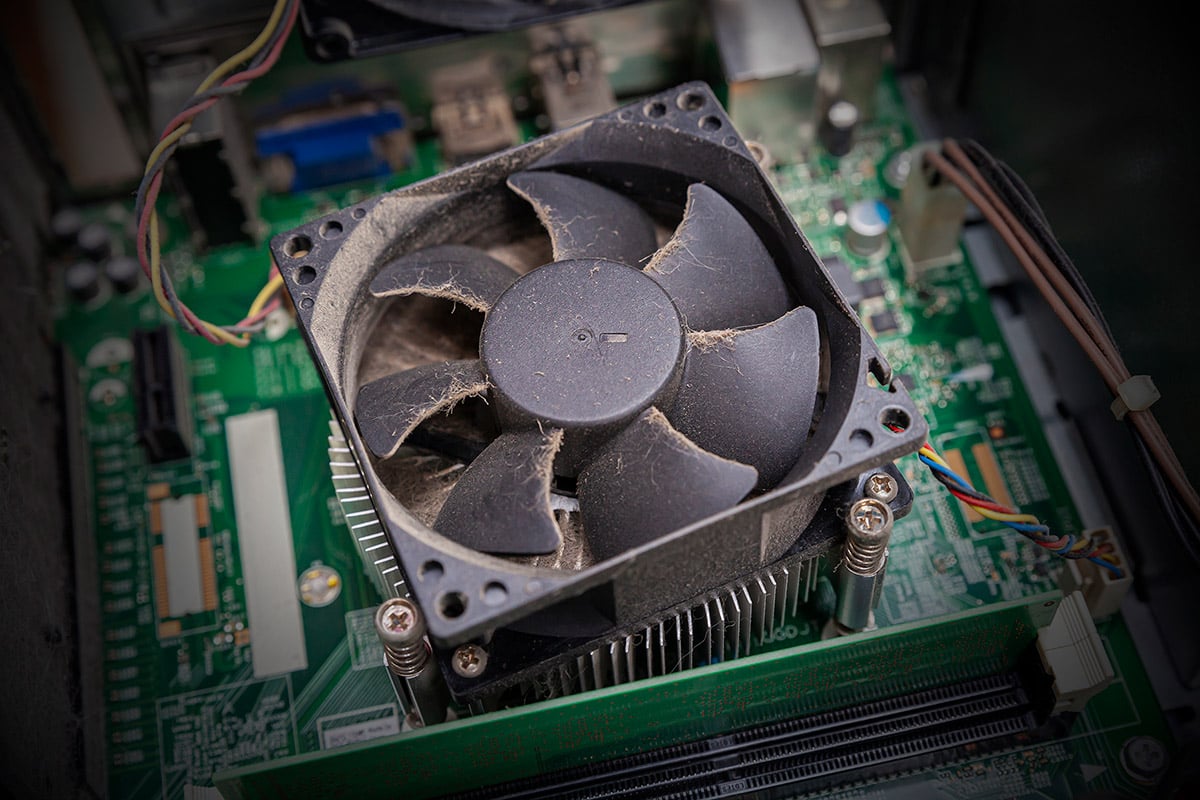
Step 5: Clean and Dust Your Computer
Completely shut down and unplug all your PC’s cords and cables.
Place your computer on a clean, flat, and well lit workspace.
Carefully remove its casing.
Using the can of compressed air, clear away dust and debris from the fans, ducts, and other components.
If blockages remain lodged in tight spaces, use cotton swabs to gently clean them.
Step 6: Reapply Thermal Paste
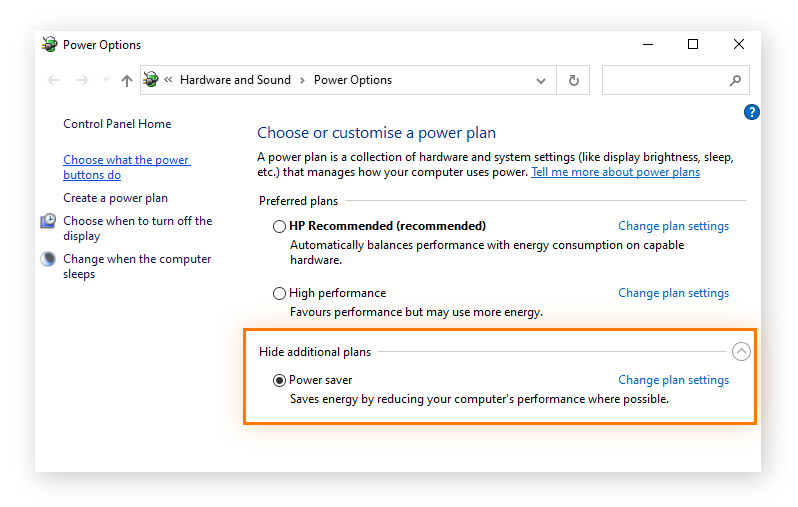
Step 7: Adjust Your Computer's Internal Settings
If your machine seems overburdened by everyday usage, try recalibrating your PC’s settings to lighten the resource load and reduce overheating. Using power saving mode is a good place to start, but you can also fine-tune other settings such as screen brightness and resolution to find the right balance between performance and efficiency.
Step 8: Check for Viruses and Malware
Step 9: Keep Your Software Updated
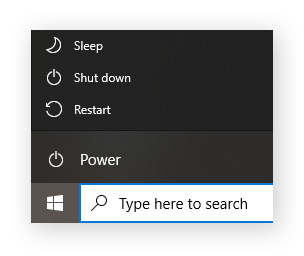
Step 10: Shut Down Your Computer
Just like you and me, computers need a break every now and again. The easiest and most reliable way to cool down a PC is to turn it off and let it rest for a while. When you boot it up again, it will benefit from a cold start and will likely run much more smoothly.
macOS:
Step 1: Check CPU Usage
If your Mac's overheating, the first and foremost thing you do is check the CPU usage. You don't need any third-party apps to do that; I'll show you how to check the CPU load using Activity Monitor:
- Open Activity Monitor (Finder > Applications > Utilities).
- Click the CPU tab.
You'll see all your apps and processes listed, from the most intensive to the least CPU-heavy.
Step 2: Close Browser Tabs You're Not Using
Having lots of open browser tabs is one of the most common causes of an overworked Mac, especially if you use Chrome. Each open tab uses memory and consumes CPU cycles. So, the more you have open, the more CPU cycles and energy you’re using. Close down those you don’t need and bookmark the web pages instead.

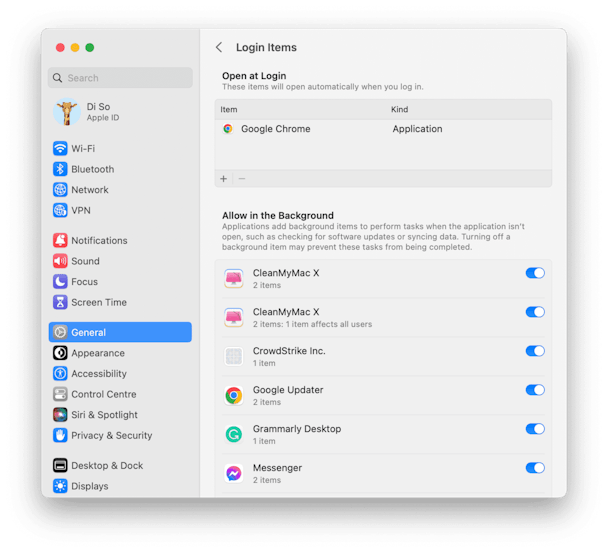
Step 3: Check Your Login Items & Launch Agents
Login items are apps that open right at your Mac's startup. Usually, we're so busy doing things on our Macs that we don't notice these login items. But your Mac sure does — it starts running hot unable to handle all programs simultaneously. Let's take a look at what login items you have enabled:
- Click Apple menu > System Settings.
- Select General.
- Go to the Login Items tab.
Here you'll find apps that launch at your Mac's startup. Select the app and click the "—" button to remove it. Done!
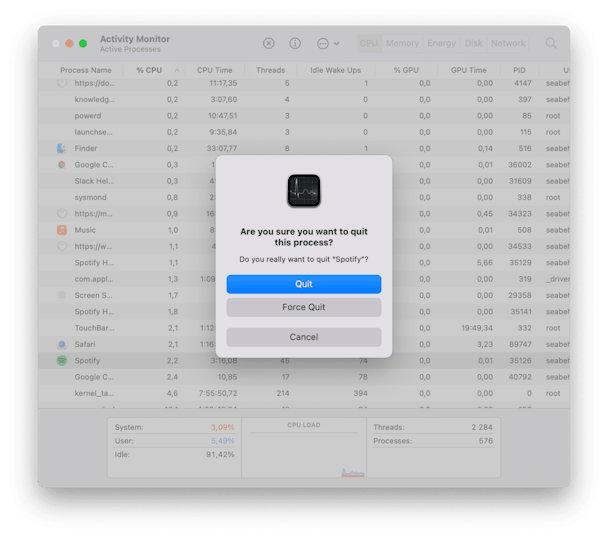
Step 4: Quit Unused Apps
Even if some apps don’t look like they’re doing very much, they still use some processing power. They’re probably using CPU cycles and carrying out background tasks that could slow things down. Here's a quick trick that will help identify and close active apps on your Mac:
- Press Option-Command-Escape.
- In the window that appears, you'll see the list of all active apps on your Mac. Select the app you want to close and click Force Quit.
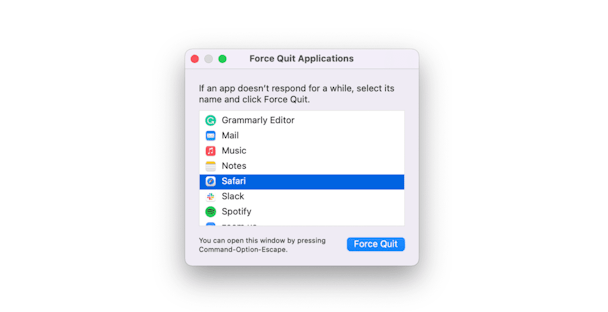
Use this little trick when your Mac starts overheating — closing unused active apps will lighten the load for your Mac's CPU.
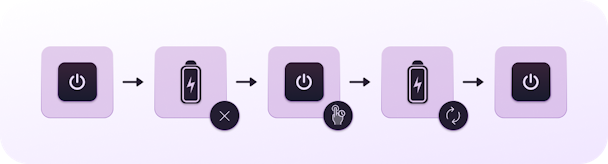
Step 5: Reset the SMC
System Management Controller is in charge of Mac’s ventilation system, among other things. If your Mac seems to be too hot without reason, maybe resetting the SMC will work for you.
Macs with a removable battery:
- Turn off your Mac and remove the battery.
- Press the power button and hold it for 5 seconds.
- Put the battery back in.
- Start up your Mac.
Macs with a non-removable battery:
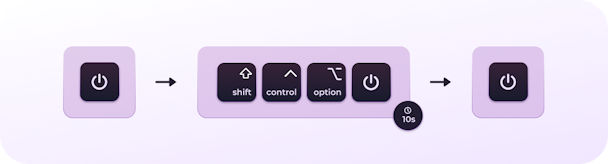
- Shut down your Mac.
- Press Shift-Control-Alt (Option), and, while holding these 3 keys down, press the power button.
- Hold all 4 buttons down for 10 seconds, then release them.
- Start up your Mac by pressing the power button.
Desktop Macs:
- Shut down your Mac.
- Pull out the power cord and wait for 15 seconds.
- Put the power cord back in.
- Wait 5 seconds, and then turn on your Mac.
Step 6: Avoid Direct Sunlight
Step 7: Physically Clean Your Mac
Dust and debris can really mess up with your Mac's fans; that's why if your Mac keeps overheating, it's time to give it a thorough cleanup. A can of compressed air can help clear those hard-to-reach corners of your Mac: you just need to remove the bottom panel and spray the air into the vents. Then, grab a microfiber cloth and gently wipe away any dust. Reinstall the bottom panel at last.
If you are not confident removing the panel yourself, you can make a Genius Bar reservation to get your Mac's fans cleared for you.
Step 8: Run Some Maintenance
If you have no time to perform these performance tweaks and get to the reason why your Mac's overheating, there is a quick solution you could try. CleanMyMac X, an app I've mentioned before, has a Maintenance module with plenty of tools that will help you troubleshoot all kinds of Mac issues.
- Open CleanMyMac X (download the app from the official site).
- Go to Maintenance.
- Click Run Maintenance Scripts.
- Hit the Run button.
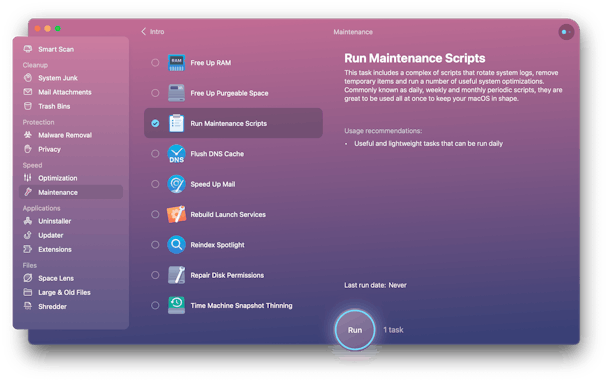
You can also run other tools, like Free Up RAM and Repair Disk Permissions, to eliminate errors and fix bugs on Mac.
Step 9: Update Your Mac
With every software update, Apple releases fixes to performance issues on Mac. Maybe this Mac overheating problem you're struggling with has already been fixed with the latest macOS release? Let's check if your Mac is up to date:
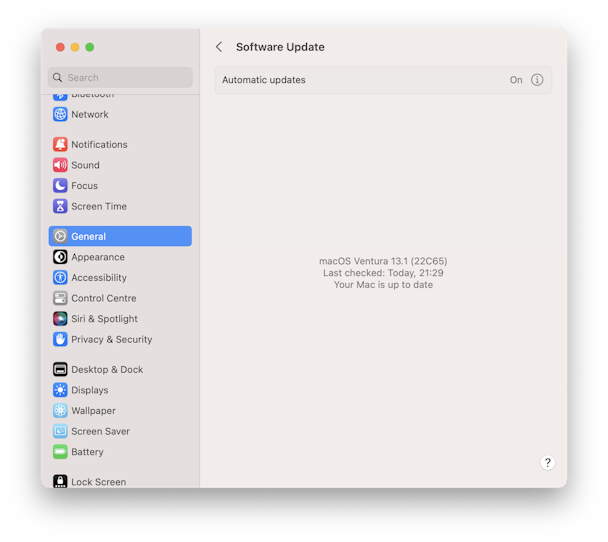
- Go to Apple menu > System Settings > General.
- Click Software Update.
- If an update is available, click Update Now.
Step 10: Unplug Peripherals You're Not Using
If you have peripherals, such as an external hard drive plugged in, and they don’t have their own power sources such as a battery or plug-in power supply, they need to draw power from your Mac. This puts additional pressure on your Mac’s battery and power management system and could contribute to overheating. So, if you’re not using them, unplug them.
Managing heat means spinning fans in Macs that have them. Fans use power, so when they spin up, if your Mac is running on battery power, it will lose charge more quickly. To avoid that happening, plug it into a power source.
There are a number of things that can cause your Mac to overheat, from misbehaving applications pushing the CPU too hard to blocked vents or fans not working, and even the ambient temperature of the room you’re working in. Whatever the cause, overheating can damage your Mac, and you should take steps to stop it and prevent it from happening in the future. By following the advice above, you’ll minimize the chances of it overheating and make sure it keeps running smoothly.
ChromeOS:
Step 1: Move the Chromebook to a Ventilated Area
Most Chromebooks do not function with the help of cooling fans. Their overall absence is part of what makes these devices so fast, lightweight, and minimal.
However, on the flip side, the lack of an internal cooling system warrants the device to be placed on a flat surface where heat can be dissipated instead of being absorbed all over again. Therefore, this is one of the prime reasons a Chromebook can overheat.
Step 2: End Excess Running Programs
Doing so will instantly help you visualize all those processes operating on the device. Terminate those you no longer need to restore normalcy in your operating system. Ending tasks in the Task Manager is nothing but a simple process. First, click on the program or app you want to shut down and select “End process.”

Step 3: Unplug Your Chromebook (If it's fully charged)
Step 4: Shut Down the Chromebook
When you boot the device back on, try using your Chromebook just like usual but don’t load up too many applications at once. That way, you can confirm the source of the overheating problem.
Maintaining the number of concurrently opened games on your Chromebook will drastically resolve the issue.
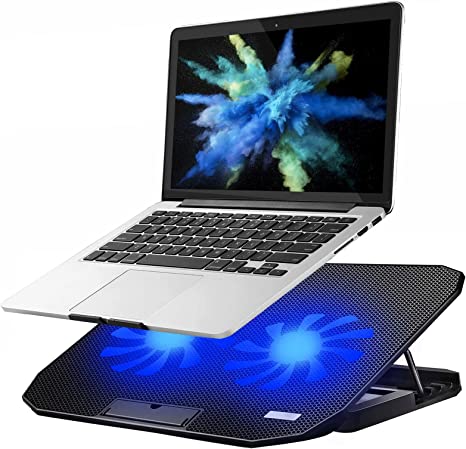
Step 5: Purchase a Cooling Pad for the Chromebook
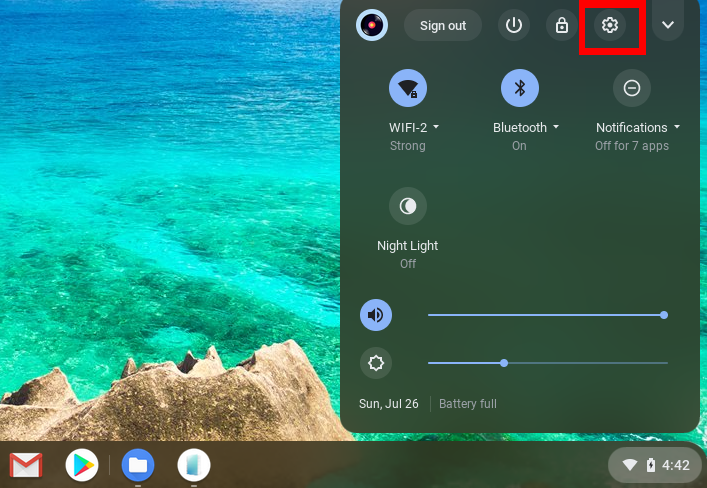
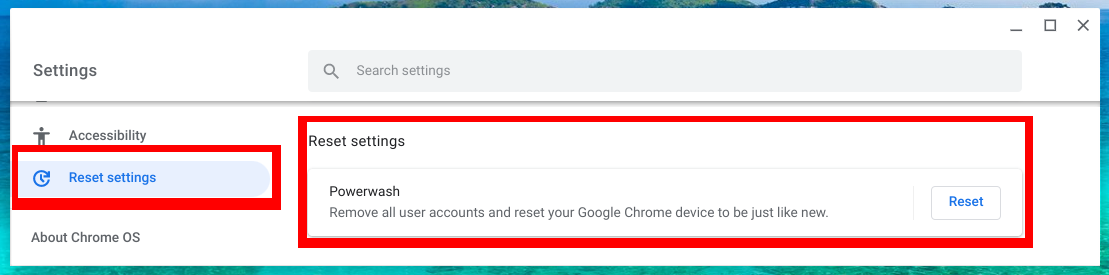
Step 6: Powerwash (Reset) Chromebook
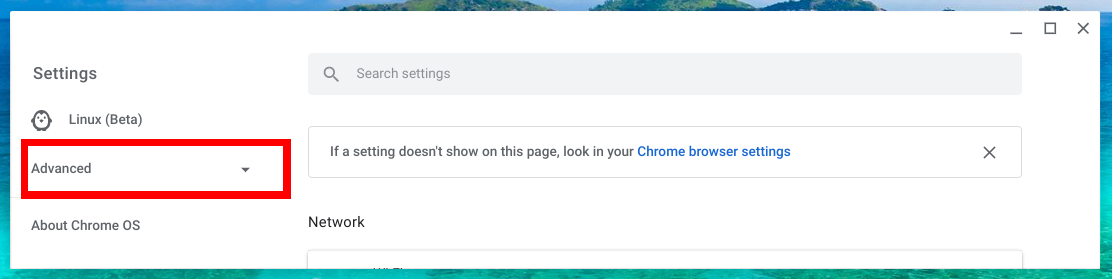
2: Scroll down and click on the ‘Advanced‘ tab to reveal more options.
Instead of initiating a Powerwash from the Settings window, you can do it from the login screen. Follow the steps below.
Step 1: While on your Chromebook login screen before entering your password for authentication, press the following key combination: Shift+Ctrl+Alt+R.
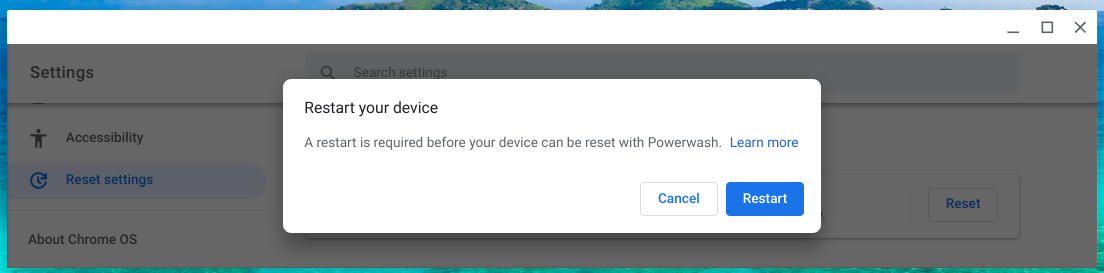
Step 2: A window will appear, prompting you to restart to reset the device. Click ‘Restart.’
Step 3: Your Chromebook will restart, and you should see a different Login screen with the Powerwash option. Click the ‘Powerwash‘ button.
Step 4: A pop-up window will appear, prompting you to confirm your action. Click ‘Continue.’
Step 7: Replace Chromebook/ System Defect
Some hardware defect in your Chromebook makes it impossible for the device to run at average temperatures. This is relatively common in devices that have proven to hold their own for a while and are now well beyond their end-of-life date.
On the other hand, if you have bought your Chromebook new and it has started to act up this way not long after your date of purchase, then it’s most likely the manufacturer’s side that you’ll have to blame. In unfortunate cases, little can be done to resolve the scenario
External Websites/Sources
Related Articles
Computer Running Slow (Windows)
Issue [Computer Running Slow (Windows) ] Devices [Laptop, Desktop] Suggested Resolutions [See Steps Below] Windows 11 & 10 If your PC is running slowly, the following suggestions might help speed things up. The tips are listed in order, so start with ...Computer Running Slow (Windows)
Issue [Computer Running Slow (Windows) ] Devices [Laptop, Desktop] Suggested Resolutions [See Steps Below] Windows 11 & 10 If your PC is running slowly, the following suggestions might help speed things up. The tips are listed in order, so start with ...Computer Running Slow (MacOS)
Issue [Computer Running Slow (MacOS)] Devices [MacBook, Mac] Suggested Resolutions [See Steps Below] Startup disk available storage Your computer’s startup disk may not have enough free disk space. To make disk space available, you can move files to ...Computer Running Slow (MacOS)
Issue [Computer Running Slow (MacOS)] Devices [MacBook, Mac] Suggested Resolutions [See Steps Below] Startup disk available storage Your computer’s startup disk may not have enough free disk space. To make disk space available, you can move files to ...Computer Making Strange Noises
Issue [Computer Making Strange Noises] Devices [Laptop, Desktop, Windows, MacOS, MacBook ] Suggested Resolutions [See Steps Below] 7 Reasons a computer is buzzing & how to fix it A buzzing noise coming from your computer is generally a sign of ...